
Customizing anything is a great way to personalize your event. After we designed the Fiji Shoot and placed these customized vinyl drink labels to spruce up the juice, champagne or mimosa bar.
How to create Vinyl Drink Labels
Pick the glass container of your choice. What you want to look for in a container is a smooth and flat surface. We found these containers at Target. Keeping the colors in mind for this stylized shoot, we choose juice that would be cohesive and pop off the wood bar back. With the juice being an ombre effect, the vinyl choice needs to be solid and light. Going with white allows for the wording to pop off the glass.
Your supplies:
Cricut Maker
White Cricut Vinyl
Cricut transfer tape
Target Glass Containers
Cricut Brightpad

 Start in your Cricut Design Space and choose your wording for your containers. We used Madina Clean font and picked descriptions that would make the shoot bit more fun.
 Weeding vinyl is a little tough on white, we used our Cricut BrightPad to assist.
 The Cricut BrightPad will show you where to take off the excess vinyl aka where you need to weed.
 Cover your vinyl (after you have weeded out the negative space) and place your transfer tape on top. Cut down your transfer tape prior to laying it on top of your vinyl drink label to save on wasted transfer. Place face down and then remove vinyl backing.
 Take your entire transfer tape/vinyl drink label and place onto the glass container. Smooth down every area with your fingers and scraper tool if you can (surface might be too curved).
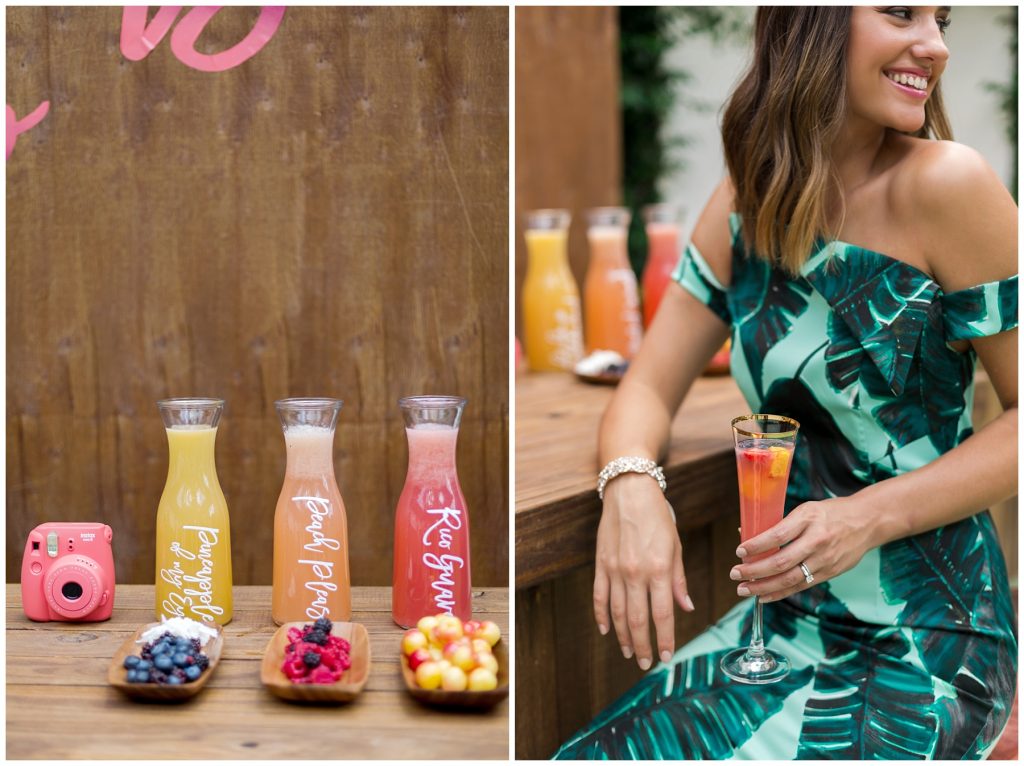 Fill with your contents and enjoy! Everyone loves a splash of humor and personalized fun!
Remember to #sharyourglitter with the vinyl drink labels you create. We can’t wait to see what you come up with!


