
We received and email from Legrand about their incredible Radiant collection and a chance to collaborate. I’m going to be honest, I loved the collection at first sight but when I told my husband about the project… he was insanely excited.
Let me upgrade you!
What I did not know was that Legrand is THE outlet company and with my father in law being a master electrician, my husband knew their reputation in the field. We looked through their products and it took us two days to narrow them all down! We had the best time imagining the possibilities together.
Outlets, USB and Chargers, OH MY!

With so many to choose from, we knew that the nightlight outlets were perfect for the kid’s rooms… the wireless phone charger option was for the kitchen and that these Rapide USB-C options would be for our bedroom. We will be updating this blog with all of the options sent to us, for now, we are finishing up our master bed room make over (with you can find here with The Home Depot) and how to install this outlet. Legrand noticed the growing demand for faster-charging capabilities and this outlet allows our devices to charge up to 40% faster.
Faster, is Better

- Use voltmeter to test if the outlet has power.
- Identify the breaker that turns power off to the outlet and check voltmeter once again to ensure power is off.
- Remove wall plate cover exposing the outlet screws.
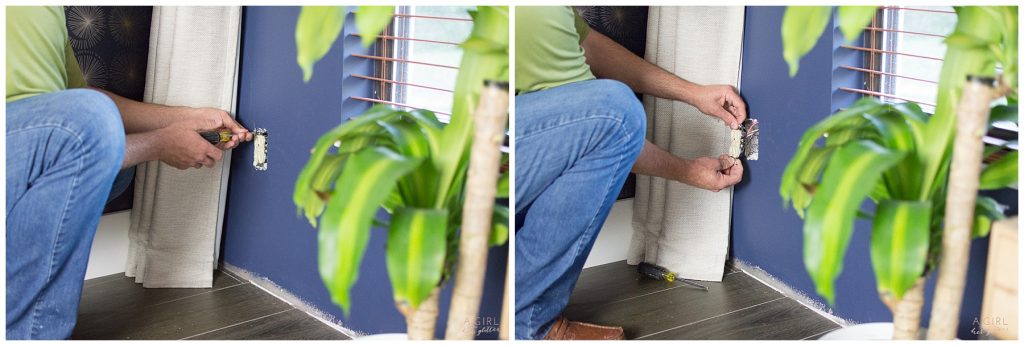
- Loosen outlet attachment screws and pull out the outlet and inspect how it is wired.
- In this case the outlet was controlled by a switch, so we turned the power back on to discover which outlet was the hot wire. In this case it was the black wire.

- Turn the power back off and remove the wires attached to the original outlet.
- This outlet had the “push” style attachment. In this case it is better to cut the wires from the outlet because if you pull the wires back out, they could be damaged and give a bad connection.

- Once the wires are cut, strip the wires back approximately ¾” to ready for new outlet install.
- For this outlet, the original had 2 neutral (white) wires and our new outlet only had 1 attachment point. For this take another 6” section of white wire, strip both ends, and twist all 3 ends together with a needle nose pliers. After, you can use the other end of the white wire as the wire to attach to the outlet.
- We are changing from a switched outlet and making it “hot” at all times. This means we won’t be using the red wire. Simply attach a wire nut to it and cover the nut and first inch of the wire with electrical tape. Once completed push this wire to the back of the outlet box.

Next attach the 3 remaining wires to your new outlet. Black (hot) to the gold screw, white (neutral) to the silver screw, and the copper ground wire to the green ground screw. When attaching these wires, make small radius with the wire to go around the screw, once on the screw try and tighten it around the screw with a needle nose pliers. Also attach it in a clockwise direction, you want the screw to help turn the wire to make a better connection. Putting the wire in a counterclockwise direction could loosen the connection.

Once all wires are on outlet securely, install the outlet back in the box with the screws supplied. Make sure the outlet is straight and centered as there is some play in outlet holes.

- Next install your Legrand Radiant series screwless outlet cover. First install the backing plate for the cover with the 2 screws supplied and install them snug but not too tight. Afterwards the screwless plate will snap into the backing plate.
- Once installed turn the power back on to the outlet and test it with your voltmeter to ensure it’s working properly.


